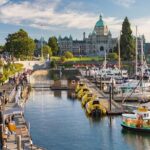
REVIEW · VANCOUVER
Photography, Hiking & Ferry to Bowen Island
Book on Viator →Operated by Nature PhotoHikes · Bookable on Viator
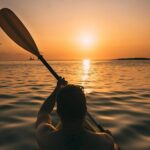
A ferry ride plus forest trails is hard to beat. This small-group tour pairs Howe Sound scenery with hands-on outdoor photography help, then adds a hike built around old-growth forest, waterfalls, wildlife, and fall color.
I especially like two things: you get real time with a professional photographer guide for one-on-one instruction, and you can borrow a DSLR while learning how to shoot better with whatever camera you carry (including a phone). It also helps that the guide takes photos of you at the best spots and sends you complimentary images after.
One thing to consider: the day runs about 6 hours on paper, but your actual time on the island can feel tighter depending on pacing and weather, so come with flexible expectations.
In This Review
- Key things I’d circle before you book
- Howe Sound ferry to Bowen Island: the part you’ll keep replaying
- Snug Cove arrival and the visitor-centre reset
- Killarney Lake parking and the hike: where fall leaves meet real forest detail
- DSLR borrowing: the fastest way to learn without buying new gear
- The guide also shoots you: better memories, not just your own view
- How the full 6-hour day tends to flow
- What to wear and bring for a wet-weather forest photo hike
- Price and value: why $133.61 feels fair here
- Who this Bowen Island photo hike is best for
- Should you book this tour?
- FAQ
- How long is the Bowen Island ferry, hike, and photography tour?
- What’s included in the price?
- Is food included?
- Can I borrow a DSLR even if I don’t own one?
- Does the tour run in bad weather?
- Where do I meet, and is pickup available?
- What if I need to cancel?
Key things I’d circle before you book
- Ferry views on Howe Sound before you even start hiking
- Small group (max 6), so you’re not guessing where to stand or what settings to use
- DSLR borrowing plus practical photo coaching for DSLR and phone users
- Old-growth forest + waterfalls + wildlife as your photo subjects
- Complimentary photos taken of you during the tour
- Fall color timing (fallen leaves, autumn tones) built into the experience
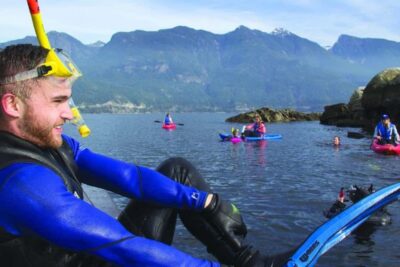
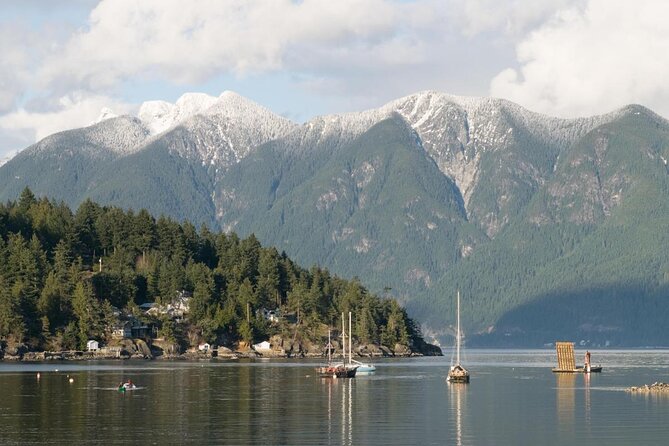
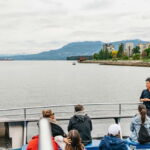
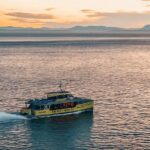
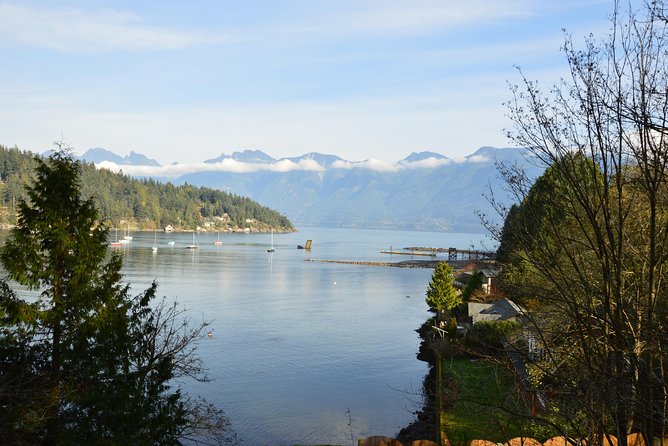
Howe Sound ferry to Bowen Island: the part you’ll keep replaying
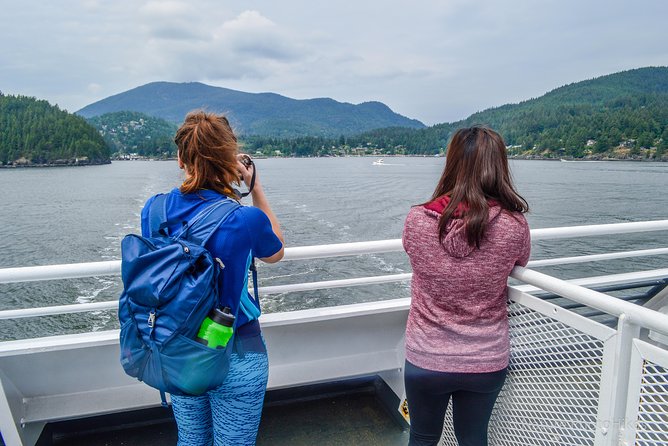
The day starts with a ride out of Horseshoe Bay, and that ferry segment is more than transport. It’s your moving viewpoint: water, islands, mountains around you, and long angles that make even a basic camera feel capable.
If you like photography, you’ll start thinking about framing immediately. On a ferry, you get changing light every few minutes, so it’s a natural way to practice quick decisions: where the horizon goes, when to include nearby islands, and how to keep the boat railing from stealing attention in your shot.
Bowen Island is also close enough that it feels like a real break, not a long transit slog. You’re on and off the water quickly, then you switch from rolling views to forest textures.
Photography tip vibe you should expect: your guide encourages you to slow down at key moments and shoot with a plan, not just rapid clicking.
You can also read our reviews of more hiking tours in Vancouver
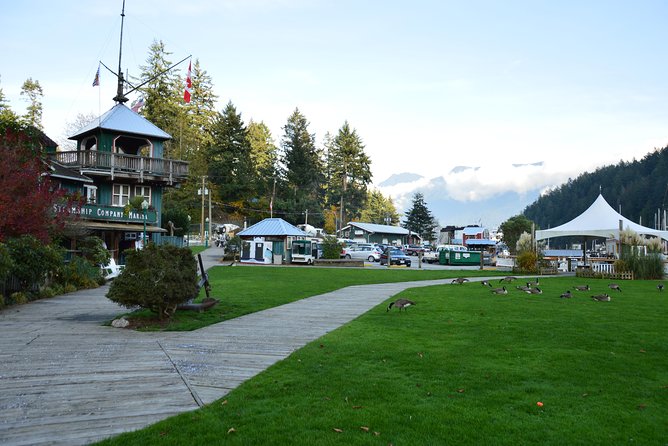
Snug Cove arrival and the visitor-centre reset
After the ferry docks at BC Ferries Bowen Island Snug Cove, the tour settles into island mode. Snug Cove is the kind of arrival point where you can orient fast, grab your bearings, and take a few quick photos before you head into the hike.
The Bowen Island Visitor Centre area works well as a reset. It’s a practical place to regroup, adjust your pacing, and get your camera ready for the slower, more detailed shooting you’ll do on trails.
The nice part here is how it supports different camera setups. If you’re on a phone, you still get help with how to see and compose. If you’re using a DSLR, you can focus on settings and control.
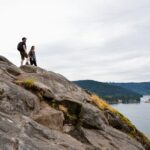
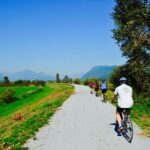
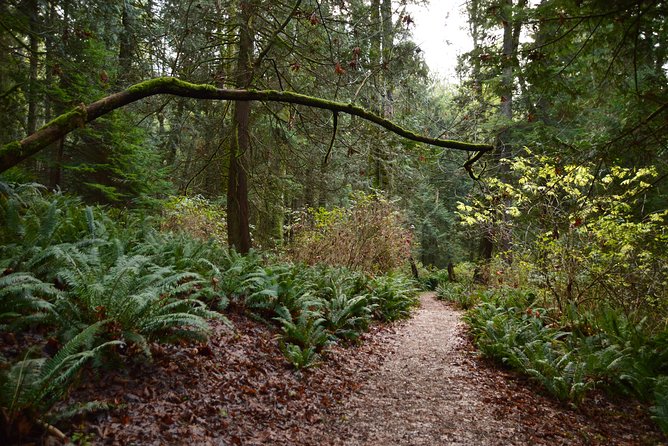
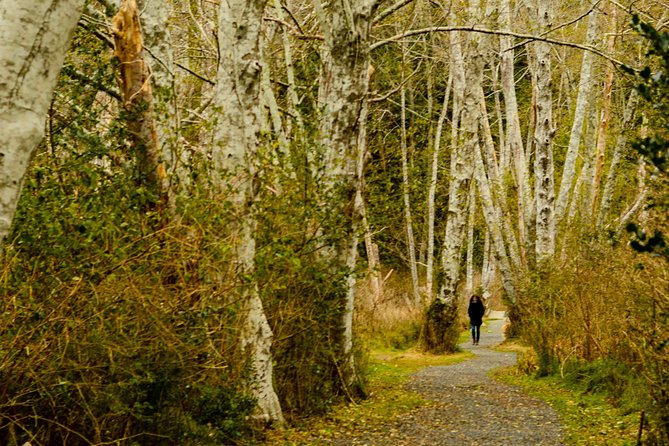
Killarney Lake parking and the hike: where fall leaves meet real forest detail
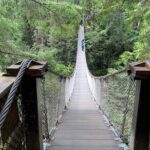
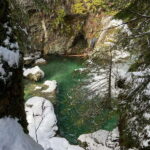
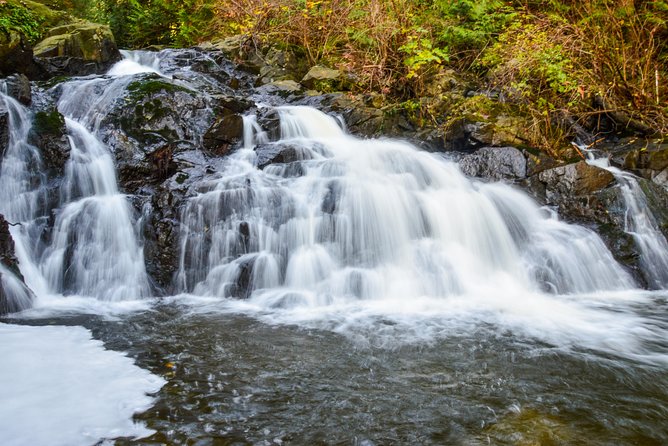
The tour moves toward the Killarney Lake Parking area, which basically tells you the day’s rhythm: you’re going to walk into forest scenes, not just shuffle on flat pavement. Expect a hike built around old-growth forest, plus waterfalls and wildlife as part of the search.
This is where the “photo hike” part becomes real. Forest photography is mostly about layers: foreground leaves, mid-ground trees, and a background that gives depth. Fallen leaves help a lot because they add color and shape at ground level, even when the sky is boring.
You’ll also get practice with the kinds of light and contrast you can’t easily recreate later in a city. Under trees, the scene can go dark quickly. Near waterfalls, you get bright highlights and misty texture. Your guide’s job is to help you keep exposure under control so your photos look intentional, not accidental.
What I like about this hiking setup: it’s designed to work for different hikers. The experience is described as welcoming for all levels, so you shouldn’t feel forced into a fitness competition just to get the best shots.
DSLR borrowing: the fastest way to learn without buying new gear

One of the smartest inclusions is the DSLR camera borrowing. If you’ve been curious about manual settings but don’t want to spend money just to try it, this is the cleanest way to test the waters.
What matters isn’t the camera brand. It’s that you’ll get coached while you’re actually standing in the scene you want to photograph. That means the lessons stick because you can apply them instantly: how to focus, what to watch in composition, and how to handle outdoor light.
Even if you don’t end up using the DSLR, the instruction is meant to help your photos improve whether you’re shooting a phone or a camera with advanced controls. That balance is useful because you can keep the day fun while still learning something concrete.
The guide also shoots you: better memories, not just your own view
Most photo tours stop at teaching technique. This one adds something practical: your guide will take complimentary photos of you during the tour, then share them at the end.
That’s a big deal for real-life travel. You get at least two photo types without juggling your camera every time:
1) shots from the guide that capture you in the landscape, and
2) your own shots where you focus on technique.
And if you’re traveling solo or as a couple, this matters even more. You’re not relying on strangers to take decent photos, and you’re less likely to miss the best moments while trying to set up.
You can also read our reviews of more photography tours in Vancouver


How the full 6-hour day tends to flow
The tour is about 6 hours long and runs in all weather, so plan for a nature day, not a sunshine-only outing. Here’s the rhythm to expect:
- Start at the Horseshoe Bay Ferry Terminal area, using a downtown meeting point in Vancouver or hotel pickup options (including the Hyatt, if that’s where you’re staying).
- Ferry ride to Snug Cove on Bowen Island, with plenty of views to shoot and enjoy.
- Bowen Island Visitor Centre time to orient and gear up for the trail and photo practice.
- Killarney Lake Parking as the practical staging point for the hike through old-growth forest scenes, waterfalls, and wildlife opportunities.
- Visitor Centre again to wrap up, regroup, and return to the ferry back toward Vancouver.
A quick note: one review suggested a shorter feel and some rush. That’s not guaranteed, but it’s a good reason to keep expectations flexible. If the weather changes or the group moves faster, your time on the island can tighten. Bring patience, and your day will feel smoother.
What to wear and bring for a wet-weather forest photo hike
The tour runs in all weather conditions, so your clothing choices matter. The general guidance is simple: comfortable shoes, appropriate clothing, water, and snacks.
I’d add a few practical photo-photo logistics:
- Wear shoes you trust on mixed ground. Forest trails can be uneven, and you’ll likely stop often to shoot.
- Bring a water bottle you won’t forget. You’ll spend time waiting for the right light and moving between spots.
- Have a snack plan. Food isn’t included, so a light bite keeps you steady during the hike and ferry ride.
If you’re using a camera, think about protection. Even light mist can be enough to make you cautious. You don’t need to turn into a gear store owner, but a simple protective approach can save your shooting time.
Price and value: why $133.61 feels fair here
At $133.61 per person, you’re paying for more than a ferry day trip. The cost is tied to several value drivers:
- Transportation + ferry ride between Vancouver and Bowen Island
- A professional photographer guide focused on teaching, not just leading
- Small-group format (max 6), which usually means less waiting around
- DSLR borrowing, which reduces the barrier if you don’t want to bring your own gear
- Complimentary photos taken during the tour
Food isn’t included, so you’ll need to budget a little extra for snacks or a meal. But compared to booking a ferry plus hiring a private photographer, the bundled instruction and gear support make the price feel reasonable.
Also, this tour is a strong fit for people who want to improve quickly. Learning basics on Bowen’s trails beats trying to practice the same skills while your vacation schedule runs you over.
Who this Bowen Island photo hike is best for
This works particularly well if you:
- want a nature day with structured photography help
- like the idea of Bowen Island’s calm feel but don’t want to plan trails from scratch
- travel with a partner and want better couple photos without awkward posing
- are camera-curious, whether you’re on a phone or ready to try a DSLR
It might be less ideal if you:
- hate getting coached and want total freedom with zero structure
- require long, slow, unplanned time on the island (this is a guided flow)
- get bothered by changing weather and quick adjustments (the tour runs in all weather)
Should you book this tour?
Yes, if you want a short, scenic day that blends ferry views, a real forest hike, and usable photo instruction. The small group size and the DSLR borrowing give it a “practice-friendly” feel, and the complimentary photos solve one of the biggest travel photo problems: getting images of yourself without guesswork.
If you’re the type who measures success by how long you spend wandering solo at your own pace, you might find the guided structure a little tight. For most people, though, the guide-led timing makes it easier to see more and come home with photos that actually look like you planned them.
If you can match flexible timing with comfortable shoes and a willingness to shoot through changing light, this is a very solid way to experience Bowen Island from Vancouver.
FAQ
How long is the Bowen Island ferry, hike, and photography tour?
It runs for about 6 hours approximately, starting at 10:00 am.
What’s included in the price?
You get a professional photographer guide, a guided small-group hike, transportation and ferry ride, DSLR camera borrowing, and a photoshoot with complimentary photos sent at the end.
Is food included?
No. Food and drinks are not included, so plan for your own snacks or a meal.
Can I borrow a DSLR even if I don’t own one?
Yes. The tour includes the option to borrow a DSLR from your guide.
Does the tour run in bad weather?
It operates in all weather conditions, and if it’s canceled due to poor weather you’ll be offered a different date or a full refund.
Where do I meet, and is pickup available?
You meet at WB W Georgia St @ Granville St in Vancouver. Pickup is available from your downtown hotel or rental accommodation, the Hyatt hotel, or the starting point.
What if I need to cancel?
You can cancel for a full refund up to 24 hours before the experience’s start time. If you cancel less than 24 hours before, the amount paid is not refunded.