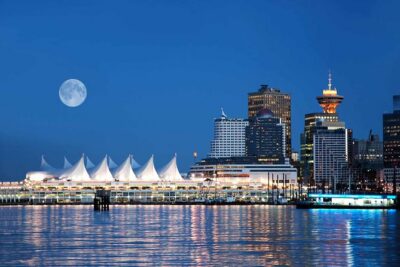
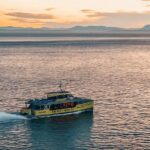
REVIEW · VANCOUVER
Photography & Rockies Road Trip
Book on Viator →Operated by Nature PhotoHikes · Bookable on Viator
Golden mountain light is hard to plan. This 5-day photography-focused Rockies road trip is built around timing, short hikes, and a pro guide who helps you turn scenic stops into real photos.
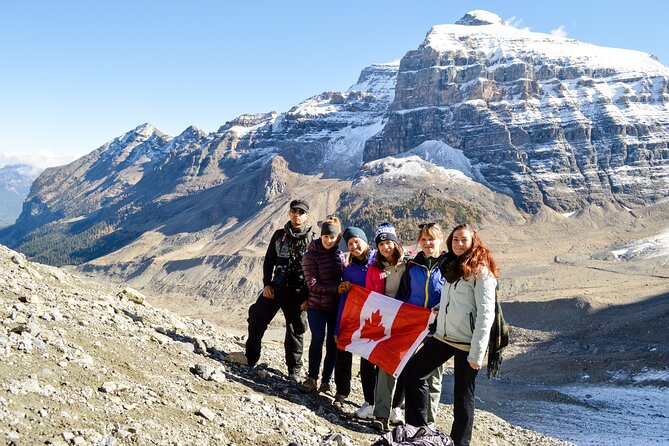
I like the small group size, with a maximum of 5 people, which keeps things flexible. I also like the hands-on camera coaching from Nafees (sometimes called Nash), with tips for both smartphone and DSLR shooting, plus guidance on composition and settings.
One consideration: the days run long, and the whole plan depends on weather. If the sky plays tricks, expect changes to protect your time in the field, not just a shuffled spreadsheet.
In This Review
- Key things to watch for
- A 5-Day Rockies Photo Trip Built for Real Shooting
- Vancouver Pickup and the Small-Group Advantage
- Day 1: Jasper National Park—Drive Time That Pays Off
- Day 2: Maligne Canyon, Sulphur Skyline, and Miette Hot Springs
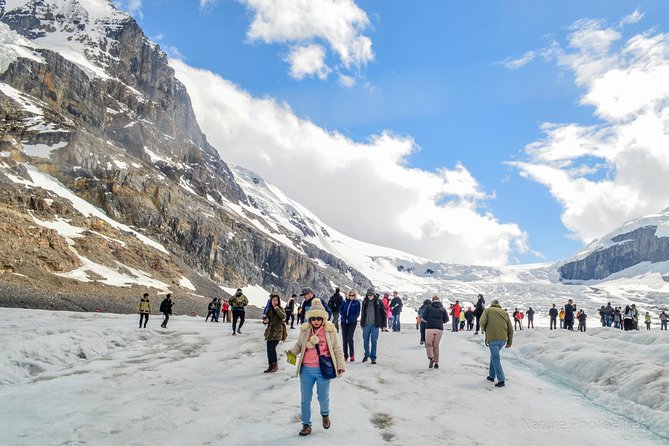
- Day 3: Athabasca Falls, Icefields, Peyto Lake, and the Lakes Between
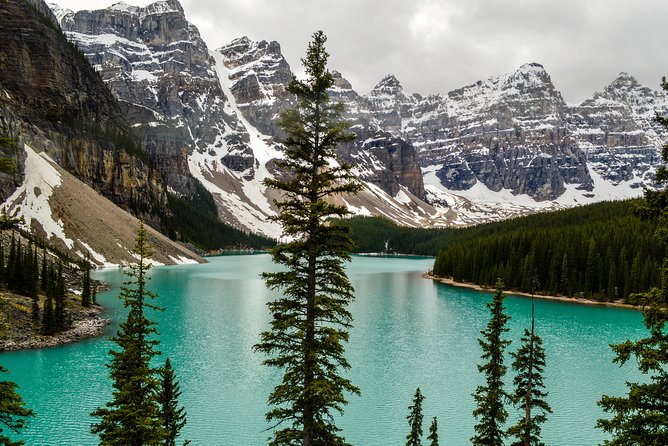
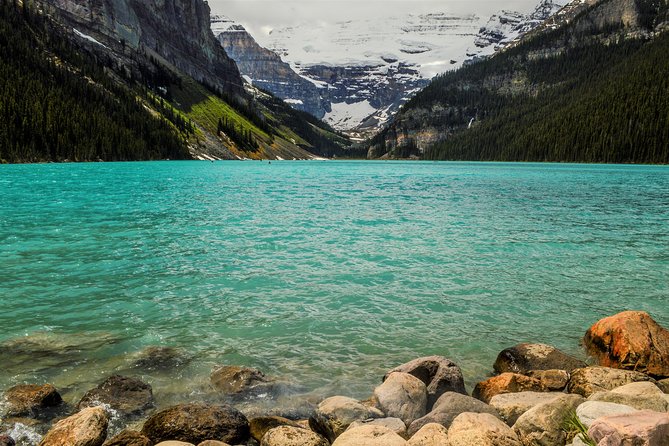
- Day 4: Lake Louise, Plain of Six Glaciers Teahouse, and Moraine Lake
- Day 5: Emerald Lake and Natural Bridge in Yoho National Park
- What the Photographer Guide Changes for Your Photos
- Hiking Comfort and Camping Reality (Pack Like You Mean It)
- Transportation, Park Fees, and What Your Money Covers
- Weather-Dependent Planning: How to Think About It
- Who Should Book This Tour (and Who Might Want to Skip)
- Should You Book? My Straight Advice
- FAQ
- FAQ
- What time does the tour start, and is there pickup in Vancouver?
- How long is the trip, and what areas does it cover?
- How many people are on the tour?
- What’s included in the price?
- What’s not included?
- What should I bring for comfort and photography?
Key things to watch for
- Small-group pace (max 5) means you get attention without feeling rushed
- Pro photography help for both phone and DSLR setups
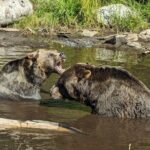
- Wildlife and canyon hikes get built into the schedule, not tacked on at the end
- Big glacier country days include major viewpoints in a single loop
- Weather-dependent planning keeps the trip realistic, but adds flexibility to your plans
A 5-Day Rockies Photo Trip Built for Real Shooting
This isn’t a “ride past the view and hope for the best” tour. The core idea is simple: you stop where the scenery matters and you learn how to work the light. That makes a huge difference when you’re dealing with fast-changing clouds, long mountain shadows, and wildlife that does not wait for your camera bag.
You’re also getting a structured rhythm—drive, walk, then reset for the next viewpoint. It keeps energy from leaking out. And because the group is capped at 5 travelers, it’s easier to adjust on the fly if one trail is busy, a lens needs a wipe, or the best light shifts earlier than expected.
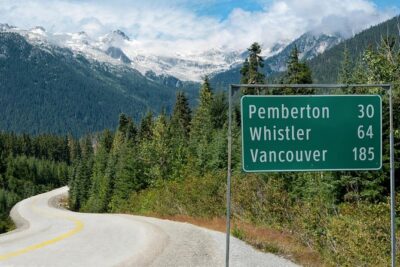
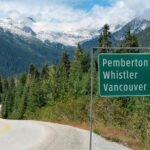
The route moves through a powerful slice of the Canadian Rockies: Jasper National Park, Maligne Canyon, the Columbia Icefields area, Lake Louise and Moraine Lake, then Yoho National Park for Emerald Lake and Natural Bridge.
You can also read our reviews of more photography tours in Vancouver
Vancouver Pickup and the Small-Group Advantage
You start at 8:00 am, with pickup offered from a prearranged Vancouver location of your choice. That detail matters more than it sounds. If you’re arriving fresh, the last thing you want is spending the first hour of the day on logistics instead of scenery.
The trip runs with a minimum of 2 people per booking and a maximum of 5. In practice, that small size changes the feel: you’re not fighting the crowd for shoulder room on a viewpoint. It also makes coaching easier—Nafees can check your framing, remind you when to change settings, and guide you on what to focus on next.
There’s a mobile ticket, and confirmation comes within 48 hours of booking (subject to availability). That’s helpful when you’re trying to lock things in without months of waiting.
Day 1: Jasper National Park—Drive Time That Pays Off
Day 1 is all about getting into Jasper National Park. You’ll drive to Jasper through Kamloops and the Rockies, with a full day on the road (about 8 hours). That sounds like a lot, but it sets you up for the next days when the hikes and viewpoints demand more attention.
Why this day is worth it: Jasper is the base for the rest of your loop. The more smoothly you get there, the better you can use the next mornings for the type of photography that needs patience—wildlife spotting, layered mountain views, and lighting that can shift quickly.
The main downside is also the main reality: this is not a short “stretch break” day. You’ll want to come ready for a long seat time. Pack water and snacks if you know you get hungry while driving—food and drinks aren’t included.
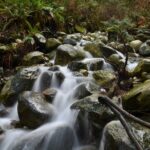
Day 2: Maligne Canyon, Sulphur Skyline, and Miette Hot Springs
Day 2 focuses on Maligne Canyon plus a hike on the Sulpher Skyline trail, then time at the Miette hot springs. You’re on the move for about 6 hours, so the day is active but not exhausting in a grind-it-out way.
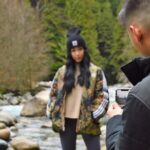
Here’s what I’d expect you to love about this stop: canyon scenery gives you lines, textures, and depth—perfect for photography where the goal is more than just a postcard. A hike adds a different angle, letting you shoot from levels you can’t reach from a viewpoint platform.
Then you get the reward part: the Miette hot springs. After a hike, a warm soak can reset your legs and your mood. It’s also a nice contrast to cold-weather mountain light—so you’re not just collecting views, you’re recovering.
The consideration: bring footwear with real traction. Canyon country can mean slick or uneven ground. If your shoes aren’t broken in, your feet will become the loudest voice in the group.
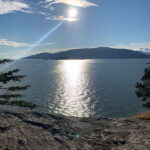
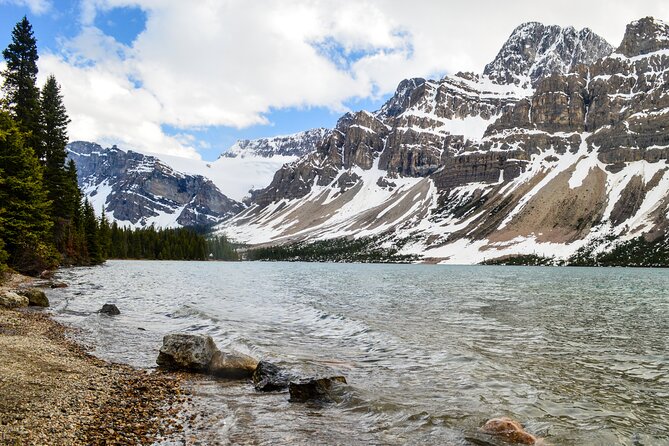
Day 3: Athabasca Falls, Icefields, Peyto Lake, and the Lakes Between
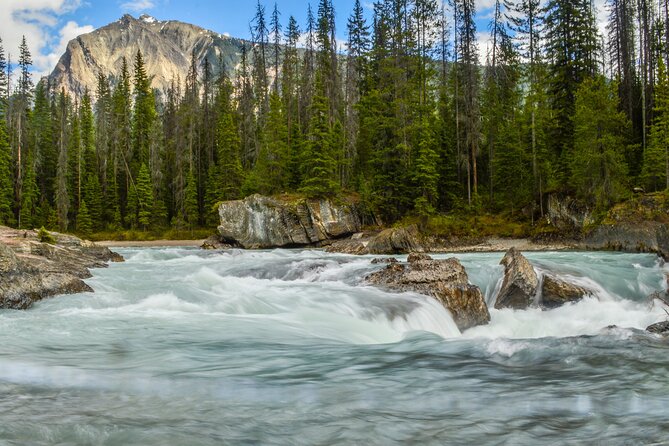
This is your big day in the mountains: about 8 hours with Jasper town, Pyramid and Patricia Lakes, Athabasca Falls, Columbia Icefields, and Peyto Lake.
There’s a reason this day gets the “glacier country” feel. You move from waterfall impact to icefield-scale scenery to distant lake views. That mix is excellent for photographers because it forces variety: motion (falls), scale (icefields), and distance layering (lake and valley shots).
It also makes the day useful for non-photographers. If glaciers are your thing, great. If not, the waterfalls and lakes still deliver strong scenery without needing fancy gear.
Possible drawback: long distances between stops means you’ll have limited time at each viewpoint. That’s exactly where the photo coaching helps. If you know how to set exposure and compose quickly, you waste less time fiddling and more time getting the shot.
This is also a day to plan your layering. Even when the air is mild, mountain weather can shift. A couple of warm layers can save you from shivering through the best light.


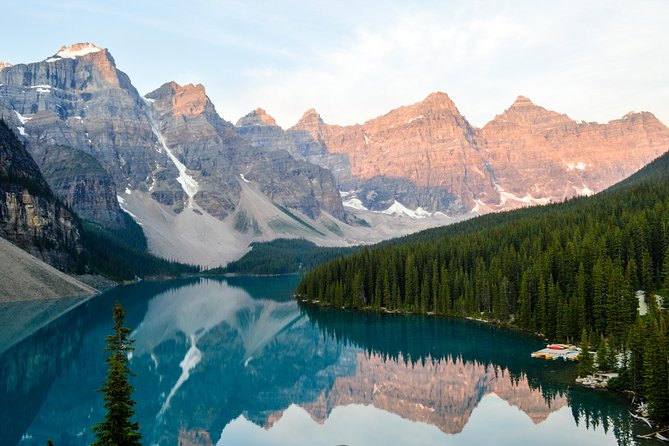
Day 4: Lake Louise, Plain of Six Glaciers Teahouse, and Moraine Lake
Day 4 is where the Rockies reputation becomes real. You’ll visit Lake Louise, hike the Plain of Six Glaciers and Teahouse, and stop at Moraine Lake. Again, about 8 hours.
Lake Louise delivers the kind of scenery that almost always photographs well. But the hike is what changes the experience. The Plain of Six Glaciers route gives you perspective you can’t get from the shoreline alone. And when you’re working toward a teahouse goal, you’re not just walking—you’re building a photo story from lower views up toward more dramatic angles.
Then Moraine Lake adds the other side of the “wow.” It’s a short stop compared to the hike, so you’ll want to have your camera ready when the light hits. The tour’s photo focus helps here: you learn how to react fast when conditions improve.
One practical consideration: bring snacks to Lake Louise/Moraine. Food and drinks aren’t included, and it’s easier to keep energy steady when you’re not searching for a meal right when the scenery peaks.
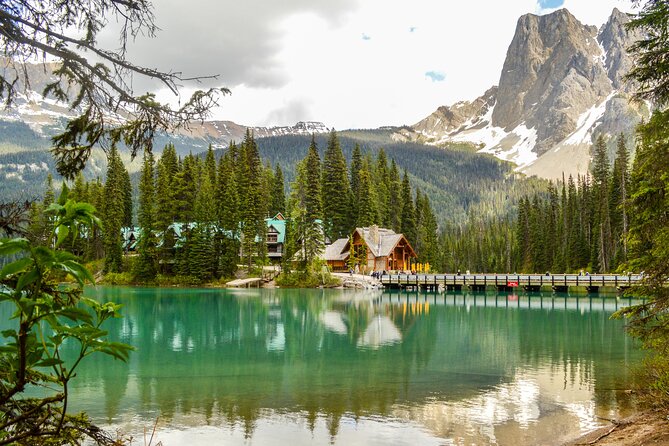
Day 5: Emerald Lake and Natural Bridge in Yoho National Park
Day 5 is shorter (about 1 hour) and focuses on Emerald Lake, plus a stop at Natural Bridge—all in Yoho National Park.
This is a smart way to end. After days of long driving and multiple stops, you get a lighter “final chapter” that still includes classic Canadian Rockies scenery. Emerald Lake is a strong photo subject because it’s clean, recognizable, and great for color-focused shots.
The Natural Bridge stop adds variety. Even if you don’t spend a lot of time there, a geological feature like that helps break up the week so it doesn’t feel like the same shot recycled five ways.
Just don’t plan your departure plans so tightly that you feel rushed. Because the tour is weather dependent, the exact timing of your last stops can shift.
What the Photographer Guide Changes for Your Photos
This tour earns its money by teaching you to shoot smarter, not just by taking you to pretty places.
The pro guide (Nafees) supports both smartphone and DSLR photography. In practical terms, that means you’re not stuck with one type of gear. You’ll get help with camera settings, composition tips, and guidance on how to take advantage of lighting.
One of the most praised details is the way the itinerary is structured to optimize lighting and location. That matters because in the Rockies, the best light can be brief. If you’re waiting until you arrive to start thinking about exposure, you’ll miss your window.
You’ll also get advice aimed at real-world shooting:
- keep your equipment light and compact
- bring a cloth to wipe your lens or smartphone screen if rain or mist rolls in
- stay flexible with dates because weather affects what you can shoot best
That last point is crucial. When the sky clears, you’re ready. When it doesn’t, the trip can still be worthwhile—if you planned for flexibility instead of demanding perfect conditions.
Hiking Comfort and Camping Reality (Pack Like You Mean It)
The package includes professionally led hiking and a camping component. The exact camping format isn’t spelled out day-by-day here, but the important bit for you is this: you should pack like you’ll be moving with gear, not like you’re going to a hotel.
Based on the trip’s design and feedback, hiking isn’t framed as extreme. Still, “not too demanding” doesn’t mean “flip-flops fine.” Come with comfortable, broken-in shoes with traction. Layers help because mountain temperatures can swing.
If you’re carrying a DSLR, remember the advice to keep your setup lightweight. Long days mean your shoulder and wrists matter. A camera you can manage is a camera you’ll actually use.
Also: expect to bring your own essentials like snacks since food and drinks aren’t included. If you’re the type who gets grumpy when you’re hungry, this is the easiest problem to solve before you leave Vancouver.
Transportation, Park Fees, and What Your Money Covers
The price is $1,158.78 per person for about 5 days. That’s not cheap, but you’re also paying for a lot of “hidden costs” that add up fast if you self-plan.
Included items:
- driver/guide and transportation
- national park fees
- professional photographer guide
- professionally led hiking and camping experience
Not included:
- food and drinks
- upgrades in accommodation (hotel/hostel)
- things like canoe rentals or gondola tickets
Value check: if you try to DIY this route, the cost isn’t only gas. It’s also park access, guided support, timing, and the coaching that helps you get better photos without wasting daylight. You’re paying for someone to manage the plan and help you shoot with intention.
And because the group maxes at 5, you’re not paying for a massive crowd experience.
Weather-Dependent Planning: How to Think About It
This trip depends on good weather. If it’s canceled due to poor weather, you’ll be offered a different date or a full refund. That’s the kind of policy that makes a photography trip less stressful, because cloudy, rainy conditions can ruin a shoot plan.
Your job is to prepare for variable conditions:
- bring layers
- wear shoes with traction
- have a lens/screen cloth ready
- pack snacks so you’re not stuck rationing energy
The good news is that the guide’s approach is built for shifting conditions. Instead of treating weather as failure, the trip treats it as the reality of mountain travel.
Who Should Book This Tour (and Who Might Want to Skip)
This is a great fit if you:
- care about photography and want instruction that actually helps you use your gear
- want a structured Rockies loop without planning every turn yourself
- like small groups and a guide who can adjust the pace
- are comfortable with moderate hiking and long driving days
You might want to skip if you:
- hate weather uncertainty and need a perfectly fixed schedule
- don’t want long time in the vehicle between major stops
- expect food to be included (it isn’t)
If you’re traveling solo, the small group setup and the guide’s local handling style can make you feel more at ease. That’s especially true when you’re learning how to shoot and you’re not stuck figuring everything out alone.
Should You Book? My Straight Advice
Book it if you want to come home with better photos and a smoother Rockies experience than DIY planning would give you. The combination of photo coaching, a tight group size, and a route that emphasizes both wildlife and glacier-country viewpoints is the main reason to choose this.
Don’t book it if you’re expecting a “relax with scenic views” vacation. This is active, timing-focused, and weather-aware. If that’s your style, you’ll enjoy how the days connect into a coherent photography story.
FAQ
FAQ
What time does the tour start, and is there pickup in Vancouver?
The tour starts at 8:00 am. Pickup is available at a prearranged Vancouver location of your choice.
How long is the trip, and what areas does it cover?
It runs for approximately 5 days and includes stops around Jasper National Park, Maligne Canyon, Athabasca Falls and the Icefields area, Lake Louise and Moraine Lake, and Yoho National Park for Emerald Lake and Natural Bridge.
How many people are on the tour?
The tour has a maximum of 5 travelers. There is also a minimum of 2 people per booking.
What’s included in the price?
Included are the driver/guide, national park fees, a professional photographer guide, professionally led hiking and camping experience, and transportation.
What’s not included?
Food and drinks are not included, and activities like canoe rentals or gondola tickets are not included. Accommodation upgrades to a hotel/hostel are also not included.
What should I bring for comfort and photography?
Wear comfortable, broken-in shoes with traction and use layers. Keep camera equipment light and compact, bring a cloth to wipe your lens or smartphone screen if rain hits, and plan to bring snacks for the Lake Louise/Moraine area since food and drinks aren’t provided.