REVIEW · VANCOUVER
Photography & Walk in Stanley Park
Book on Viator →Operated by Nature PhotoHikes · Bookable on Viator
Stanley Park looks best through a lens. This 2-hour photography walk mixes old-growth rainforest, classic Vancouver views, and sunset light at English Bay, all while you learn practical camera basics. I especially like the one-on-one instruction that works for both smartphones and DSLRs, and I like the built-in photo stops that line up with the light you want. The only real catch is you’ll be on your feet for a decent stretch, so choose this tour only if you’re comfortable walking at a relaxed pace.
This tour can also be weather-dependent since it’s centered on outdoor viewpoints and sunset timing. Good weather matters, and the guide may adjust where you linger based on conditions.
If you want your photos to look more intentional fast, this is a smart way to spend an afternoon in Vancouver instead of just wandering around with no plan.
In This Review
- Key highlights you’ll feel right away
- A Stanley Park photo walk that actually teaches you something
- Price and value: $39.49 for a guide, transport, and lessons
- Meeting point and timing: start at 3:00 pm, chase the light
- The route: from Brockton Point to Seawall, then English Bay sunset
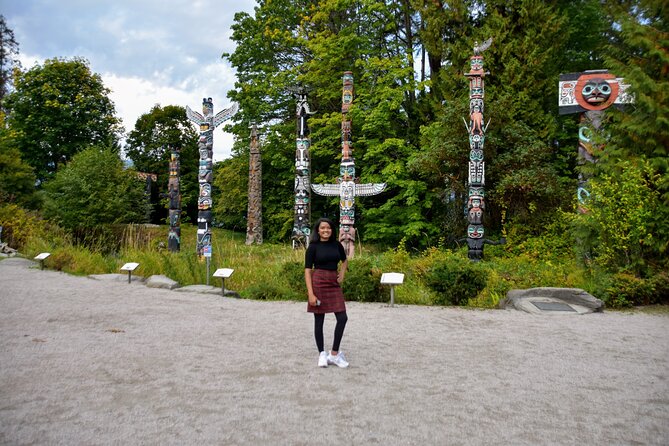
- Stop 1: Brockton Point Totem Pole
- Stop 2: Stanley Park and old-growth forest scenes
- Stop 3: Vancouver Seawall viewpoints
- Stop 4: English Bay for sunset photos
- Stop 5: Lost Lagoon for a quieter nature feel
- What you’ll learn: smartphone tips, composition, and core camera settings
- Composition that works in real scenes
- DSLR settings: aperture, shutter speed, ISO
- Smartphone photography tips and tricks
- The guide experience: attentive, safety-minded, and inspiring
- Walking pace and how to choose your comfort level
- Weather, gear, and what happens if conditions aren’t ideal
- Who should book this Stanley Park photography walk?
- Should you book Photography & Walk in Stanley Park?
- FAQ
- How long is the Stanley Park photography walk?
- What time does it start?
- Where do I meet for the tour?
- Does the tour include transportation?
- Is this tour limited to a small group?
- Can I use my smartphone for the photos?
- Can I borrow a DSLR if I don’t have one?
- Are photos included at the end of the tour?
- What happens if the weather is poor?
- What is the cancellation window?
Key highlights you’ll feel right away
- Small-group format (max 7): you get more attention while shooting.
- One-on-one photo teaching: composition plus DSLR basics, with smartphone tips too.
- Golden-light route: Seawall views that are especially good during golden and blue hours.
- Sunset at English Bay: you’re positioned at Vancouver’s popular beach when the light shifts.
- Complimentary photos after the tour: helpful if you’re traveling solo or just want a second set of picks.
- Easy, customizable walking pace: you can go deeper into the forest or stick to main spots.
A Stanley Park photo walk that actually teaches you something
Vancouver has a lot of pretty places. The trick is turning pretty into photos that feel like you were paying attention. This tour is built for that, with a simple plan: walk iconic spots in Stanley Park and along the water, then learn how to frame what you see.
You’re guided through both the what and the how. The guide covers landscape photography fundamentals like composition, plus DSLR settings such as aperture, shutter speed, and ISO. And if you’re using your phone, you still get real instruction, not just vague tips.
I like that the experience is practical. You aren’t just stopping at viewpoints and hoping for the best. You’re learning how to control light, depth, and focus while you walk.
You can also read our reviews of more photography tours in Vancouver


Price and value: $39.49 for a guide, transport, and lessons
At $39.49 per person for about 2 hours, this lands in the “good value for a focused experience” category. You’re paying for more than sightseeing.
What you get is a mix of guided logistics and skill-building:
- A professional photographer guide
- Transportation to and from the tour meeting point
- The option to borrow a DSLR (if you want), while your own camera or phone works too
- A photoshoot during the walk
- Complimentary photos at the end
- A small-group walking tour (so you’re not lost in a big crowd)
If you’ve ever felt like you wasted time at a scenic spot because you didn’t know what to adjust, this is aimed right at that problem. Even if you only learn a couple of settings or composition tricks, you’ll get more use out of your remaining days in Vancouver.
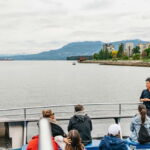
Meeting point and timing: start at 3:00 pm, chase the light
The tour starts at 3:00 pm and runs for roughly 2 hours. It begins at 655 Burrard St and ends back at the same meeting point.
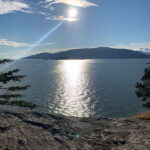
That 3:00 pm start matters because the itinerary is built for the light shift. Stanley Park’s viewpoints can look great in any weather, but sunset changes the whole mood. You’ll be at English Bay to catch that moment when the sky and water start cooperating.
If you’re deciding what to do on your first day, this timing is useful. It gives you sunset photos and also gives you a few camera moves you can reuse later.
The route: from Brockton Point to Seawall, then English Bay sunset
This walk is designed around five photo stops, so you’re not guessing where to go or what to shoot next. The order also helps because each location offers a different background: carved icons, forest depth, waterline panoramas, and then open beach sky.
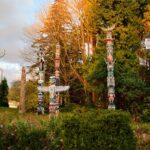
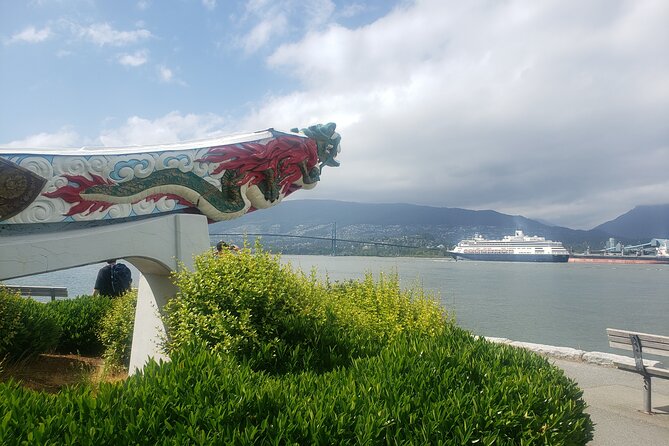
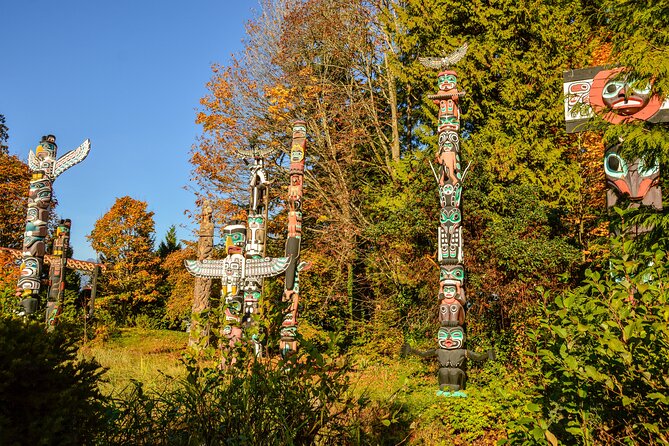
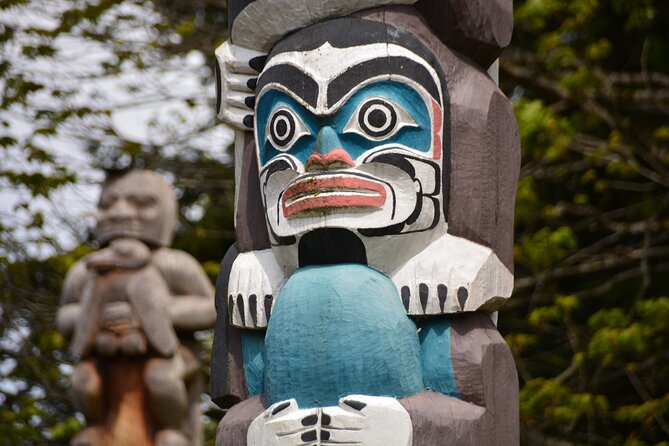
Stop 1: Brockton Point Totem Pole
You’ll start at Brockton Point Totem Pole, a classic Stanley Park landmark near the entrance area. It’s a solid early stop because it gives you a structured subject right away—something with lines and textures you can practice framing around.
This is also a good moment to learn basic composition while you’re fresh. Totem poles can be tricky if you shoot from the wrong angle, because they can look either crowded or oddly flat. You’ll get help thinking about position and the background relationship.


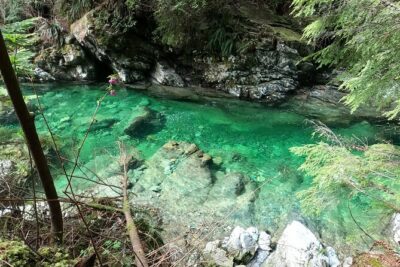
Stop 2: Stanley Park and old-growth forest scenes
Next you move into Stanley Park itself, where old-growth forest details do a lot of the heavy lifting for photos. This is where forest light becomes your subject—sun filtering through branches, trunks fading into the background, and layered greens that can look very different depending on camera settings.
The tour is described as easy, fun, and safe, and it’s also said to be customizable based on your physical ability. In practice, that means you can choose how far you want to walk among the main spots versus deeper forest areas.
If your goal is forest portraits, details, and moody textures, this part matters more than you might think. You’re learning how to translate “beautiful scenery” into images with intention.
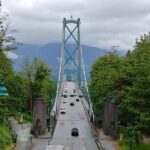
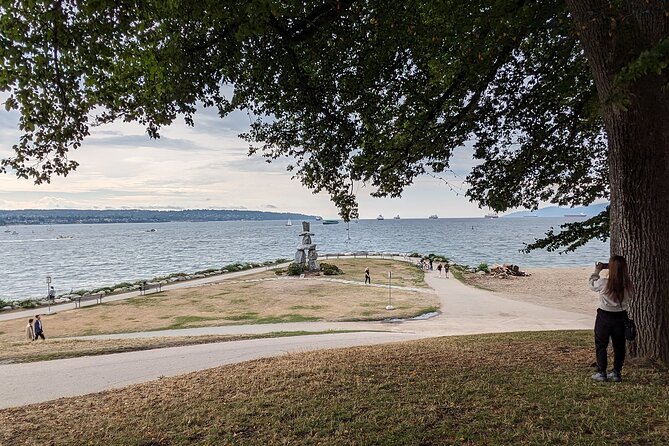
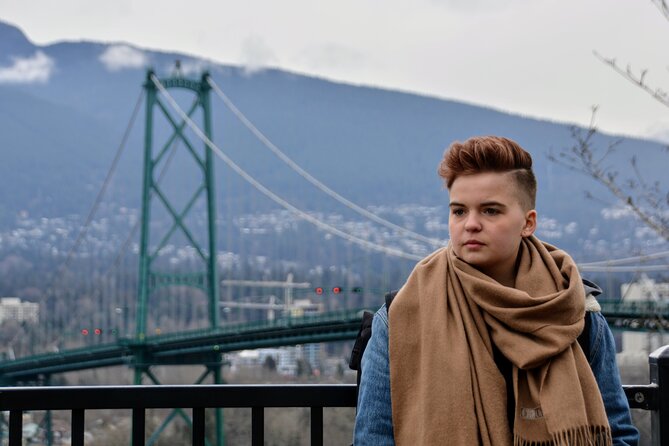
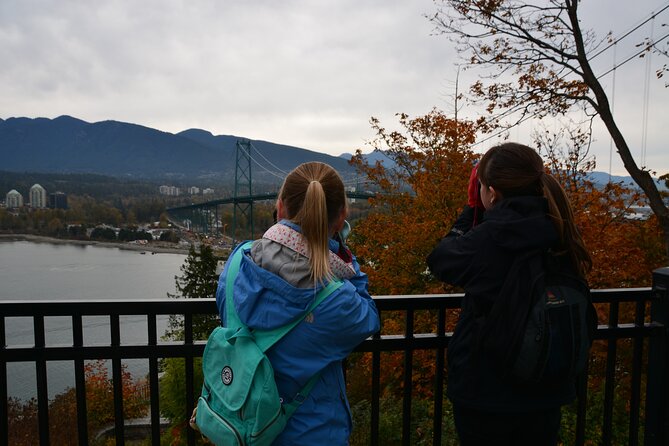
Stop 3: Vancouver Seawall viewpoints
Then comes the Vancouver Seawall, one of the best places to shoot water, skyline edges, and mountain silhouettes. The Seawall is also where perspective changes fast: you’ll have different sightlines only a few steps apart.
This stop is especially valuable for the “golden and blue hours” theme. When the light turns warm, water reflects like a mirror. When it turns cooler, the sky and mountains often look sharper and more graphic.
A small warning: Seawall views can get busy. The advantage here is that the guide is watching your timing and positioning so you aren’t just shooting through crowds.
Stop 4: English Bay for sunset photos
From the Seawall you shift to English Bay, Vancouver’s popular beach area. This is the centerpiece for the tour’s sunset plan, and it’s right where you want to be when the sky starts shifting.
English Bay is also a great place to practice landscape photography basics because you’ll have everything in one frame: horizon line, changing sky color, and water reflection. If you’re using a phone, it’s also a friendly testing ground for learning how to expose and compose for bright sky without losing the rest of the scene.
The guide’s teaching style is a big part of why this stop works. In particular, the photos are not treated like luck-based luck-of-the-light. You’re taught how to think about the shot as you walk into it.
Stop 5: Lost Lagoon for a quieter nature feel
Finally, you’ll visit Lost Lagoon, which offers a different texture from open beach and major viewpoints. Lagoon areas usually mean softer reflections and a calmer atmosphere—often better for slower, more deliberate compositions.
This is where you can practice tightening your frame and using background separation. Even without complicated gear, it’s a place where a bit of planning pays off because the scene has depth.
If you enjoy wildlife-adjacent scenery (even if you don’t guarantee animal sightings), this stop gives you a change of pace and a chance to shoot something less “postcard obvious.”
What you’ll learn: smartphone tips, composition, and core camera settings
The tour is built around teaching fundamentals you can use immediately. You’ll learn landscape photography basics for both smartphone and DSLR shooting, which is ideal if you’re traveling with friends using different devices.
Composition that works in real scenes
Composition sounds abstract until you try it in the park. Here, you’re practicing what to include and what to leave out—how to place the horizon, how to manage distracting foregrounds, and how to use natural frames from trees and shoreline angles.
Because the stops are planned, you get a steady flow of shooting opportunities. That makes it easier to remember what your guide just explained and apply it right away.
DSLR settings: aperture, shutter speed, ISO
If you’re using a DSLR (or borrowing one), you’ll get an explanation of core settings:
- Aperture (for depth of field and background separation)
- Shutter speed (for how motion and reflections feel)
- ISO (for exposure when light changes)
In Stanley Park, light conditions shift constantly. It’s a perfect place to learn because the rainforest canopy can make the scene darker, then you step out toward the water and the brightness jumps.
Smartphone photography tips and tricks
The tour explicitly includes smartphone guidance. That matters because a phone is usually what you actually carry every day.
One of the standout benefits from the experience is the practical focus on phone shooting—help that goes beyond generic advice. If you’ve got an iPhone or Android and you want better landscape shots without buying gear, you’ll likely pick up quick adjustments that make a noticeable difference.
The guide experience: attentive, safety-minded, and inspiring
The best part of a photography tour is the guide’s ability to translate scenery into a plan. Here, the photographer guide is described as professional and highly capable, with a clear love of Stanley Park that makes the walk feel purposeful.
You also get the kind of attention that helps on a small-group walk. The tour format supports one-on-one guidance, so you can ask questions without feeling rushed or lost.
For solo travelers, the added value is even more obvious. A complimentary photo shoot during the tour means you’re not always stuck asking strangers to take your picture. If you want memories where you’re actually in the frame, this is a big plus.
Walking pace and how to choose your comfort level
Stanley Park is not the flat mall-world kind of walking. Even a “fun and safe” tour includes forest paths and viewpoint transitions, and the experience notes that you should have a strong physical fitness level.
At the same time, it’s also said the guide will customize the route based on your physical ability. So you can likely control how deep you go into the forest versus staying at main spots.
My practical advice:
- If you’re comfortable with a steady walk and occasional uneven surfaces, you’ll be fine.
- If you tire easily, tell the guide early so you can match the pace and still get great shots.
Weather, gear, and what happens if conditions aren’t ideal
This experience is described as requiring good weather. That’s not just a polite note—this is a sunset-and-outdoor-view tour. If conditions aren’t right, the plan changes or the date may be reworked.
In terms of gear, you don’t need to show up with a specific camera. You can bring any type of camera you have. A DSLR can be borrowed if you want to learn with one, but smartphones are fully supported.
Also, the tour uses a mobile ticket, so you’ll want your phone handy even if you aren’t using it as your camera.
Who should book this Stanley Park photography walk?
This tour is a strong fit if you:
- Want photography instruction while seeing Vancouver’s most iconic nature spaces
- Shoot with a smartphone or DSLR and want a clearer path to better results
- Prefer a small-group experience where you can actually get help
- Are traveling solo and want complimentary photos so you’re not missing from your own travel story
- Like walking with a plan, not just checking boxes
It may be less ideal if you:
- Don’t feel comfortable with outdoor walking and changing terrain
- Want a purely relaxed sightseeing outing with no camera learning
- Are booking last-minute in uncertain weather and can’t be flexible
Should you book Photography & Walk in Stanley Park?
If your goal is to leave Vancouver with stronger landscape photos and a few techniques you’ll use again, I’d book it. The value comes from the combination of a guided route, hands-on teaching for both smartphones and DSLR settings, and the practical bonus of complimentary photos after the tour.
If you’re the kind of traveler who likes to understand what makes a shot work—horizon placement, depth, exposure—this tour gives you that foundation fast without turning it into a classroom.
Just be honest about walking comfort and be prepared for weather to matter. With that in mind, this is a smart, efficient way to experience Stanley Park and English Bay while learning how to photograph them better.
FAQ
How long is the Stanley Park photography walk?
The tour runs for about 2 hours.
What time does it start?
It starts at 3:00 pm.
Where do I meet for the tour?
You meet at 655 Burrard St, Vancouver, BC V6C 2R7, Canada.
Does the tour include transportation?
Yes. Transportation is included.
Is this tour limited to a small group?
Yes. The maximum group size is 7 travelers.
Can I use my smartphone for the photos?
Yes. The tour teaches smartphone tips and tricks, and your phone camera will work.
Can I borrow a DSLR if I don’t have one?
Yes. A DSLR camera can be borrowed, but any type of camera you bring will work.
Are photos included at the end of the tour?
Yes. You’ll have a photoshoot during the tour and receive complimentary photos after.
What happens if the weather is poor?
The experience requires good weather. If it’s canceled due to poor weather, you’ll be offered a different date or a full refund.
What is the cancellation window?
You can cancel for a full refund up to 24 hours before the experience’s start time.