REVIEW · VANCOUVER
Vancouver: Entry Ticket for the Vancouver Lookout
Book on GetYourGuide →Operated by Vancouver Lookout · Bookable on GetYourGuide
The Vancouver Lookout is the fastest way to get your bearings. Ride a glass elevator up in about 40 seconds, then enjoy 360-degree views of Vancouver, the North Shore, and the wider Metro Vancouver region. It’s also been a defining part of the skyline since 1977, which adds a nice layer of meaning to what’s otherwise a simple, scenic stop.
I particularly like two things: the views are genuinely wide and photo-friendly, and the deck gives you context with informational panels (plus an optional audio tour if you bring headphones). One possible drawback: the experience can feel more self-guided than you expect, so if you’re hoping for lots of hands-on guiding, you’ll want to lean into the panels and your own scan of the horizon.
In This Review
- Vancouver Lookout: The Easy First Stop for Getting Oriented
- How the Glass Elevator and View Deck Work (Timing Matters)
- What You’ll See: 360° Vancouver, Mountains, and the Metro Web
- Panels and Audio Tour: Turning Views Into Real Place Names
- Photo-Friendly Windows and the Exterior Elevator Moment
- Price and Value: Is $16 Worth It?
- Practical Rules: Headphones, No Tripods, and Other Must-Knows
- Where This Ticket Fits Best in Your Vancouver Day
- A Quick Note on Food Expectations
- Should You Book the Vancouver Lookout Entry Ticket?
- FAQ
- What time is the Vancouver Lookout open?
- What is the last elevator time?
- Where is the entrance?
- Is this ticket valid for more than one visit?
- How long should I plan to spend at the Lookout?
- Is a guide included with the ticket?
- Can I use the audio tour?
- Is the Vancouver Lookout wheelchair accessible?
- Are tripods and selfie sticks allowed?
- What items are not allowed besides camera gear?
Vancouver Lookout: The Easy First Stop for Getting Oriented
If you only have a day or two in Vancouver, you need one quick “big picture” stop—and this is it. The Lookout puts you above street level so you can connect neighborhoods, coastlines, and mountains into one readable map in your head. After that, the rest of the city makes more sense when you’re walking around.
This ticket is for one-time entry, and you can take your time on the viewing deck. You’re not rushing through a show. You’re stepping into a high, glass-walled perch where the city stretches out in all directions, including the surrounding mountain ranges.
I also like that the viewpoint isn’t so high that it becomes abstract. You still get a clear sense of where things are, which is great for planning a sunset, a ferry ride, or a day-trip route later on.
How the Glass Elevator and View Deck Work (Timing Matters)
The Vancouver Lookout is open daily from 10:00 AM to 6:00 PM, and the last elevator up is at 5:30 PM. That means you still have plenty of time during the day—but don’t roll up right at the end and expect to linger.
Here’s how it typically feels on-site:
- You enter at 555 W. Hastings St. (the entrance is open 7 days a week).
- You go up in an exterior glass elevator that takes about 40 seconds.
- Once you’re up top, you move through the viewing deck at your pace, using the panels and windows to pick out landmarks.
A practical tip: if you want the most comfortable flow, go earlier in the day. The Lookout’s hours are generous, so early often means easier wandering and fewer people competing for the best angles.
Also keep the closing rhythm in mind: the last elevator to the top is 30 minutes before closing. If you’re chasing sunset, plan to arrive with enough margin that you’re still up there before the final ascent.
You can also read our reviews of more tours and experiences in Vancouver


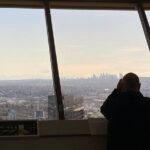
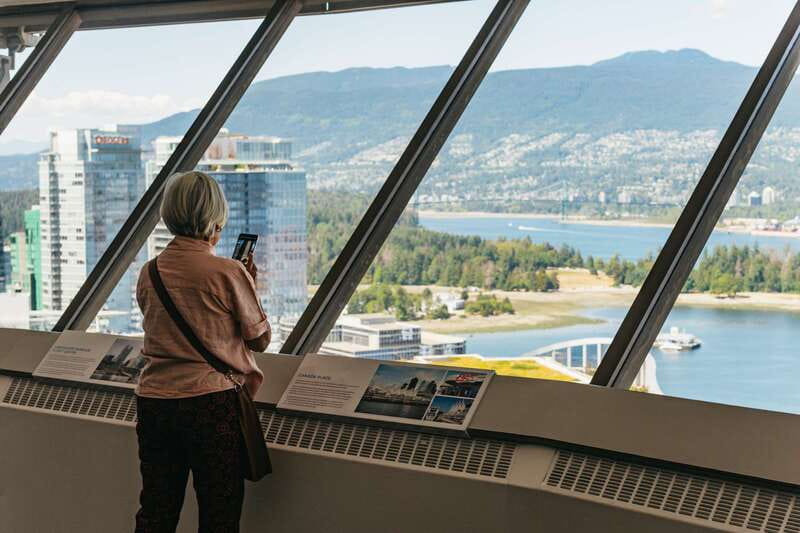
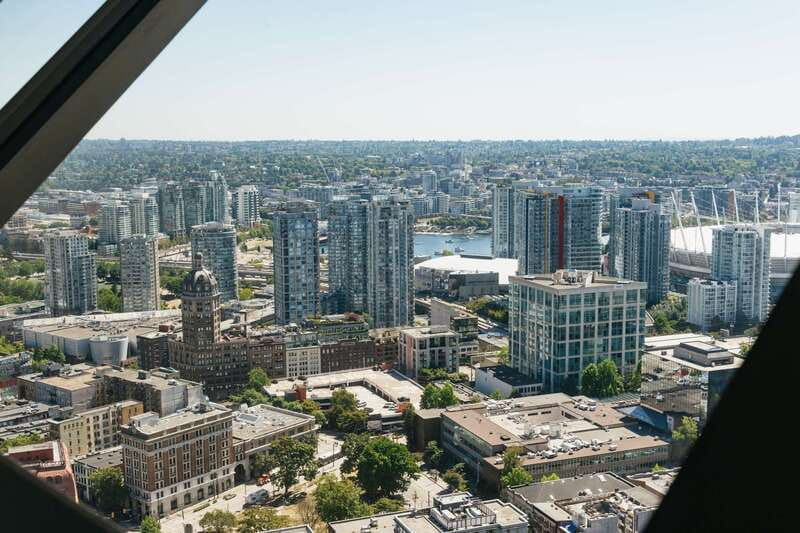
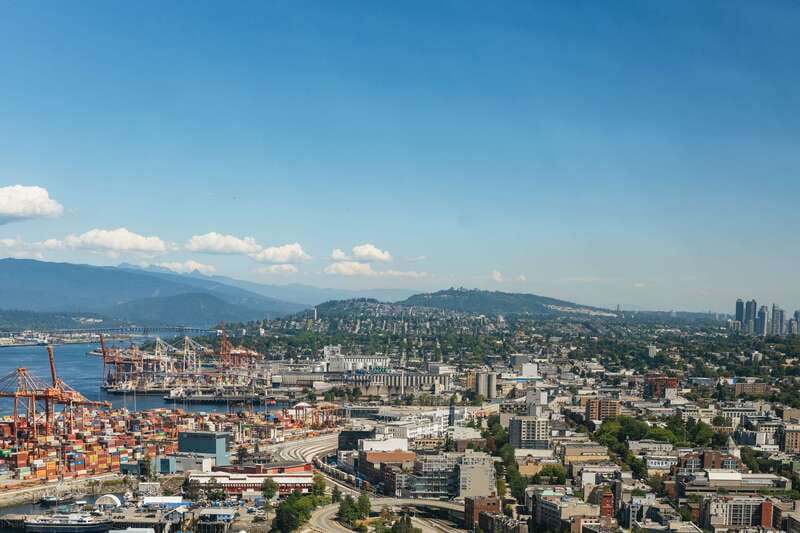
What You’ll See: 360° Vancouver, Mountains, and the Metro Web
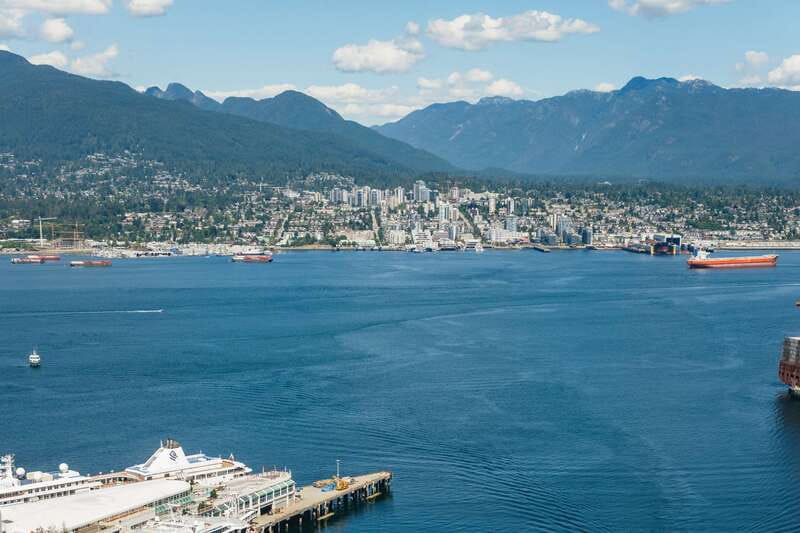
The headline is the 360-degree view, and it’s not just marketing. From the top, you can look across the city and out toward the North Shore mountains and the wider Metro Vancouver sprawl. That wider context is exactly why the Lookout works as an orientation stop.
The view isn’t only about skyline shots. It’s about understanding geography:
- You can spot where downtown sits in relation to the mountains.
- You can get a sense of how the neighborhoods spread out beyond the center.
- You can connect the city’s layout to the natural “frame” around it.
If you’re the type who likes to look, then read, then look again, you’ll enjoy the loop this place creates. First you scan the horizon, then you use the informational panels to name what you’re seeing.
On clear-weather days, it’s the kind of viewpoint where you can keep returning to the windows like it’s a panorama you haven’t finished decoding yet.
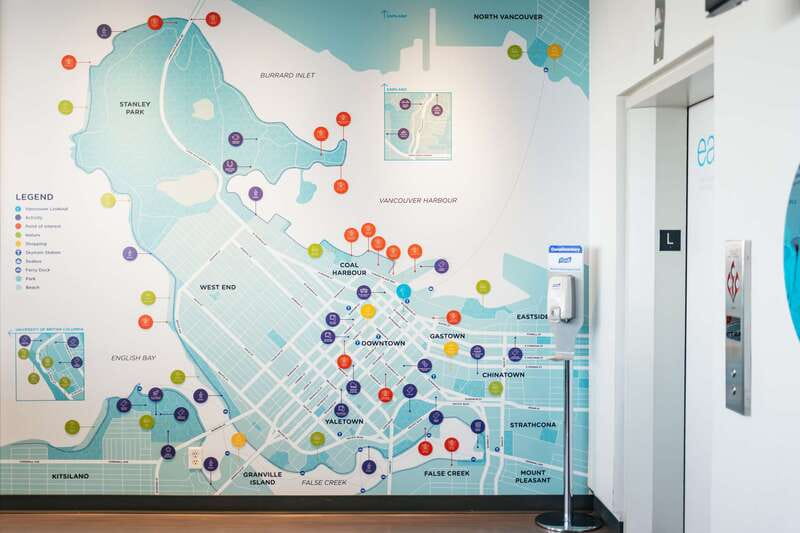
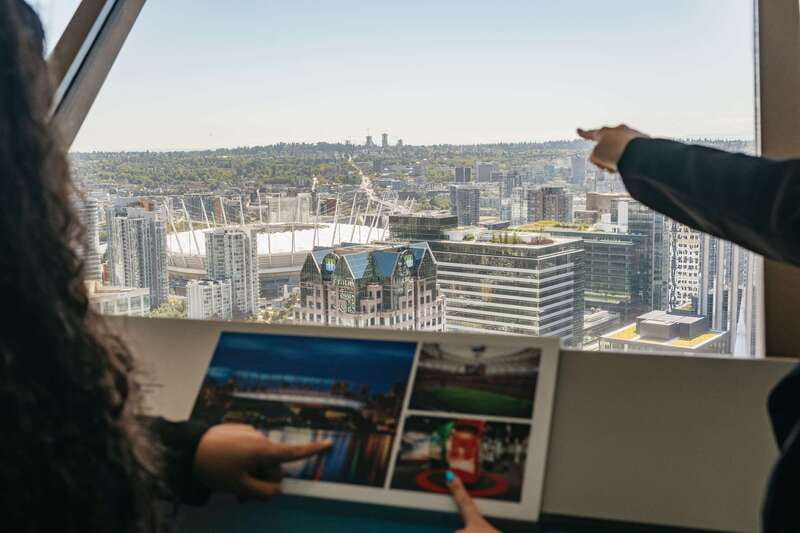
Panels and Audio Tour: Turning Views Into Real Place Names
The deck includes informational panels that explain what you’re looking at, which makes the whole experience more than “pretty skyline, done.” You’re encouraged to match visible landmarks with the labels around you.
Bring (or use) headphones for the complimentary audio tour. It’s not required, but it’s a smart add-on if you want the names and context without squinting at every sign. If you forgot headphones, the panels still do the job.
One thing I like here is how the information helps you slow down. Instead of treating the deck like a checklist, you end up spending time figuring out directions and sightlines. You also get better photos because you know what to aim at.
A small consideration: some signs and directions can be less obvious than you might expect, so if you’re chasing a specific view, be ready to take a few extra minutes to figure out where to stand for the best angle.
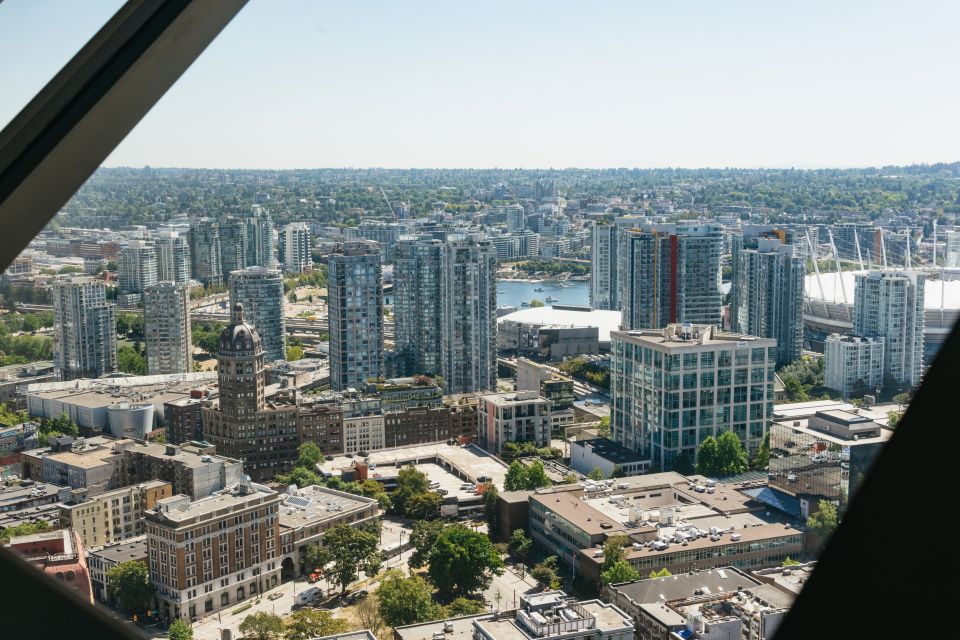
Photo-Friendly Windows and the Exterior Elevator Moment

Two highly praised parts of this experience are the clean windows and the elevator ride itself. The windows are set up for viewing and photography, so you don’t feel like you’re fighting smudges while trying to capture the city.
The elevator ride is also part of the fun. Going up in about 40 seconds gives you an immediate shift from street-level “where am I?” to top-level “oh, that’s how everything lines up.” The exterior glass setup makes the ascent feel visible and quick rather than cramped.
If you like travel rituals, this one is easy: grab your bearings on the way up, then spend the first few minutes scanning for the big shapes—downtown core, water direction cues, and mountain silhouettes. After that, the panels help you fill in the names.
Price and Value: Is $16 Worth It?
At $16 per person, the Vancouver Lookout entry ticket is priced like a practical add-on—not a once-in-a-lifetime luxury. The value shows up if you treat it as an orientation tool.
Here’s when it’s great value:
- You want a quick city overview without paying for more expensive add-on tours.
- You prefer self-paced sightseeing rather than a guided bus schedule.
- You want both skyline views and explanations from the panels.
It also works well if you’re comparing it to bus-style “hop on, hop off” approaches. If your goal is simply to see Vancouver from above and learn what you’re looking at, paying for one focused viewpoint can feel like a smarter use of time.
And it’s good to know the experience is one-time entry. You’re paying for one clean visit, which keeps it simple: go up, enjoy the deck, then come back down when you’re done.


Practical Rules: Headphones, No Tripods, and Other Must-Knows

Before you go, make sure your day doesn’t get derailed by small “no thanks” rules. The site doesn’t allow:
- Selfie sticks
- Tripods
- Pets
- Alcohol and drugs
- Speakers
So if you’re a tripod person for long-exposure shots, plan differently. Handheld photos work better, and you’ll still have wide angles through the windows.
Also note: this ticket includes one-time entry, not a guide. It’s more like you’re stepping into a well-equipped viewpoint with informational help on the deck. You bring your curiosity, and the panels plus audio guide fill in the details.
The ticket also isn’t a transportation product. You’ll need to get yourself to 555 W. Hastings St. on your own.
Where This Ticket Fits Best in Your Vancouver Day
This is a perfect “first stop” activity because it sets your mental map early. Whether you start at 10:00 AM or later, the Lookout helps you read Vancouver as a whole, not just a collection of streets.
It also fits well if you want a low-effort activity that doesn’t steal your whole day. Even though you can stay as long as you want, the viewing circuit doesn’t need to be a marathon. Some people do a full loop in under an hour, especially when the deck isn’t crowded and they move briskly from window to window.
It’s less ideal if you:
- only care about one narrow photo angle and don’t want to look around much
- expect a full guided walkthrough
- are bringing equipment that isn’t allowed (tripods, selfie sticks)
A Quick Note on Food Expectations
You might see a mention of the revolving restaurant experience in people’s plans, but that setup can change. If you were counting on the restaurant being open as part of your evening plan, keep your expectations flexible and be prepared for it not to be operating at times.
The good news: even without any meal plans, the viewpoint portion still does the heavy lifting.
Should You Book the Vancouver Lookout Entry Ticket?
Book it if you want a fast, high-return introduction to Vancouver. For $16, you get a straightforward upgrade on your understanding of the city: a quick exterior glass elevator ride, wide 360-degree views, and on-deck panels that help you name what you’re seeing.
Skip or reconsider if you’re expecting a heavily guided experience, or if you need to use a tripod/selfie stick. Also, if you plan to go right near closing, remember the last elevator up is 5:30 PM.
If you’re deciding between more complicated sightseeing plans and one simple viewpoint, this is one of the easiest picks in downtown.
FAQ
What time is the Vancouver Lookout open?
The Vancouver Lookout is open every day from 10:00 AM to 6:00 PM.
What is the last elevator time?
The last elevator up is at 5:30 PM.
Where is the entrance?
The entrance is at 555 W. Hastings St.
Is this ticket valid for more than one visit?
No. Admission tickets are valid for one-time entry.
How long should I plan to spend at the Lookout?
The viewing time is flexible. Many people walk around at leisure and may finish in under an hour.
Is a guide included with the ticket?
No. A guide is not included.
Can I use the audio tour?
There is a complimentary audio tour, and you’re advised to bring headphones (it’s not required).
Is the Vancouver Lookout wheelchair accessible?
Yes, the venue is wheelchair accessible.
Are tripods and selfie sticks allowed?
No. Selfie sticks and tripods are not allowed.
What items are not allowed besides camera gear?
Pets, alcohol and drugs, and speakers are not allowed.