REVIEW · VANCOUVER
Stanley Park Self Guided Bike Tour
Book on GetYourGuide →Operated by Moves Media · Bookable on GetYourGuide
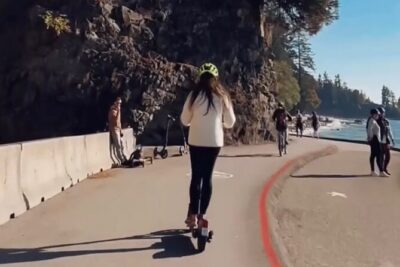
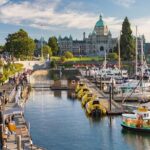
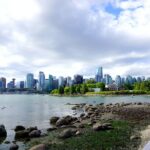
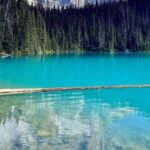
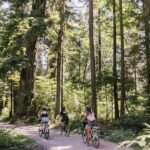
Stanley Park is made for two wheels. This self guided bike tour pairs an easy ride with GPS-triggered audio on your phone, so you get history and local notes right as you roll past the main sights. You’re following a classic 9km loop for around 2 hours, with stops that line up with the best-known highlights like the Stanley Park Sea Wall.
I especially like how the commentary is guided by your location (not just a generic route map), and how it’s available in multiple languages, including English and Spanish. There’s also a clear “pause and take it in” feel, since you can stop around major landmarks such as the Totem Poles, Brockton Point, the Vancouver Aquarium area, Lions Gate Bridge viewpoints, and beaches like Third Beach. One drawback to plan for: bike rental isn’t included, and headphones aren’t included either—plus GPS-triggered playback may depend on how your phone is set up.
In This Review
- Key things to know before you start
- Starting in downtown Vancouver at Spokes Bike Rental
- How the GPS audio tour works on your phone
- The ride length and effort: easy cruising for most cyclists
- Stanley Park Sea Wall: the view that makes the effort worth it
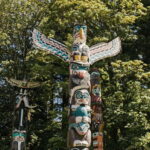
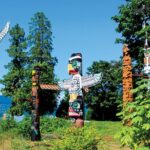
- Totem Poles and Brockton Point: storytelling while you pass the classics
- Vancouver Aquarium area: stopping without turning your ride into a full visit
- Lions Gate Bridge viewpoints: photos, angles, and timing your stop
- Third Beach (plus options like Second Beach): the “yes, get changed” moment
- How to think about the price: $6 is for the audio, not the bike
- Who this tour fits best (and who might want something else)
- Packing tips that actually make a difference
- My take: what you gain from choosing this self guided audio approach
- Should you book this Stanley Park self guided bike tour?
- FAQ
- Where does the Stanley Park self guided bike tour start?
- How long is the tour?
- Is bike rental included?
- Do I need headphones?
- What route and distance should I expect?
- How hard is the ride?
- Is it available in different languages?
Key things to know before you start
- GPS map + location-based audio so the narration cues as you ride
- Easy 9km loop with only a few small hills, paced for a relaxed ride
- Major stops on one route: Sea Wall, Totem Poles, Brockton Point, Aquarium area, Lions Gate Bridge, Third Beach
- Headphones are not included, so bring wireless earbuds or use a speaker
- Phone setup matters: keep the device accessible so GPS-triggered commentary can work smoothly
- Multi-language audio is a big plus if you’re riding with mixed-language friends
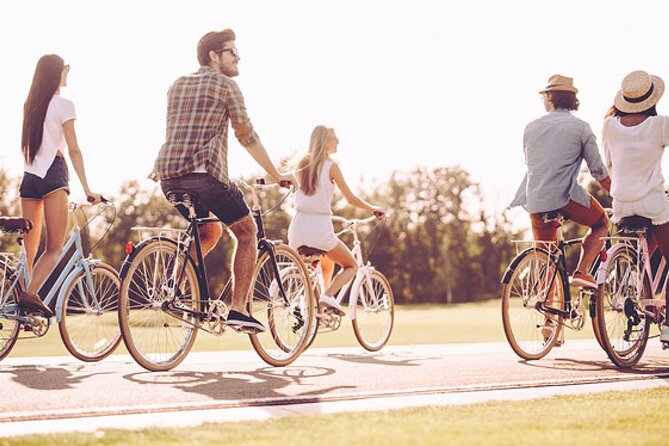
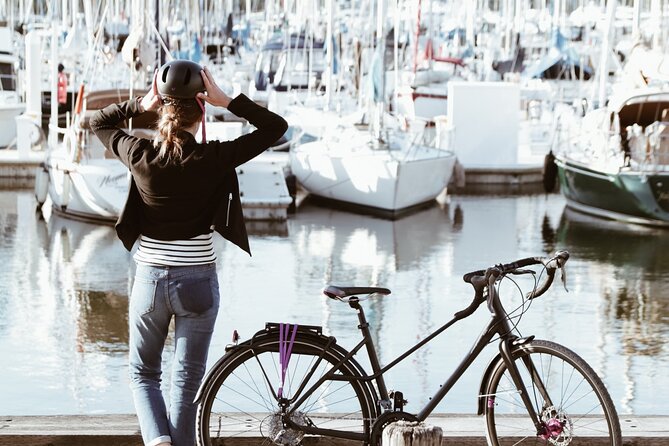
Starting in downtown Vancouver at Spokes Bike Rental
Your ride begins at Spokes Bike Rental, 1798 W Georgia St, Vancouver. This matters more than it sounds: you’ll want your bike sorted and ready before you start the audio, so you don’t end up standing around while your phone is hunting for GPS.
The ticket covers access to the GPS-based audio tour, not the bike itself. So think of this as a low-cost way to “upgrade” your self guided ride with story-based guidance. If you’re comparing costs, the $6 is mainly for the audio experience; the bike rental and any gear you bring (like earbuds) are your extra pieces.
You can also read our reviews of more cycling tours in Vancouver

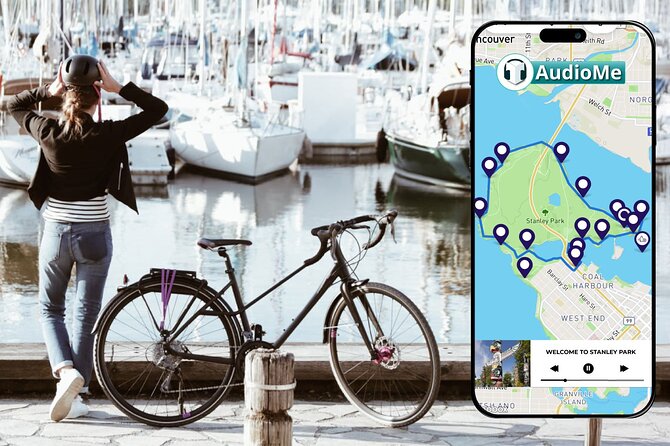
How the GPS audio tour works on your phone
The core of this experience is the AudioMe Tours app with location-based narration. Download the app on iOS or Android, then follow the GPS route while the commentary cues at key moments.
Here’s the practical side of that:
- You’ll want enough battery for a full ride plus a bit of buffer.
- Use wireless earbuds for the cleanest audio, or a speaker if you’re riding with someone who’s close enough to share the sound.
- The tour includes a GPS map that shows your position and the route.
One important consideration from real-world feedback: GPS progress and narration may not feel smooth if your phone isn’t accessible (for example, if it requires the screen to be unlocked). So if you want the “it just plays at the right time” experience, keep your phone in a workable state instead of locking it and forgetting it.
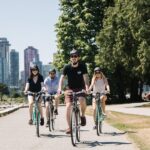
The ride length and effort: easy cruising for most cyclists
You’re looking at about 2 hours for the loop, and the difficulty is listed as easy with a few small hills. That’s an important fit check: Stanley Park can still feel hilly in small stretches, but this route is designed to be manageable for beginners and casual riders.
Pacing is part of the value here. Even if you could ride the loop faster, the audio is telling you when to slow down—so you end up with a better experience than “just biking for miles.” Plan to pause when the narration cues you toward views and landmarks, especially if you want photos or a quick snack stop.
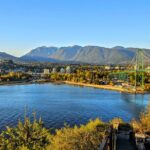
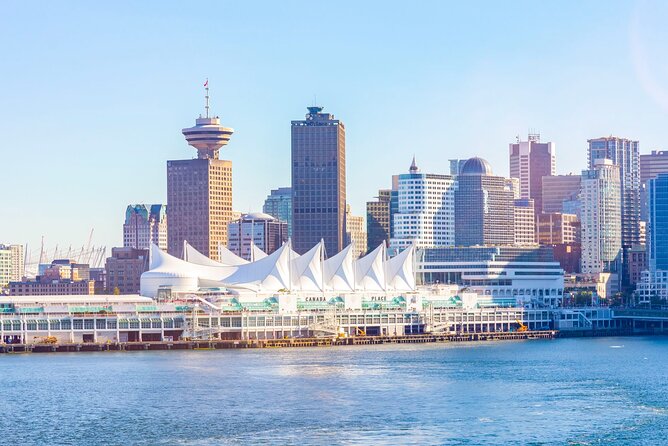
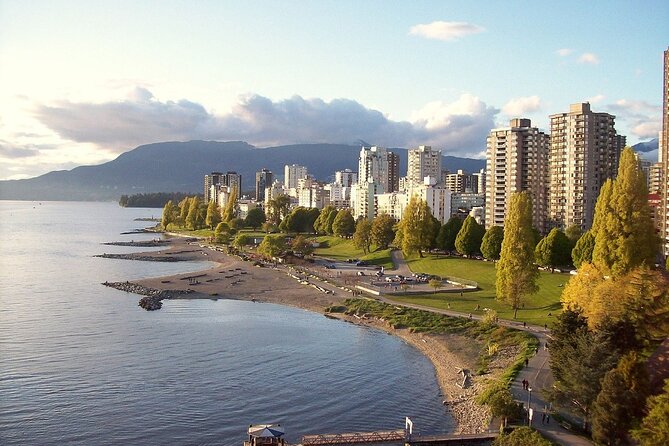
Stanley Park Sea Wall: the view that makes the effort worth it
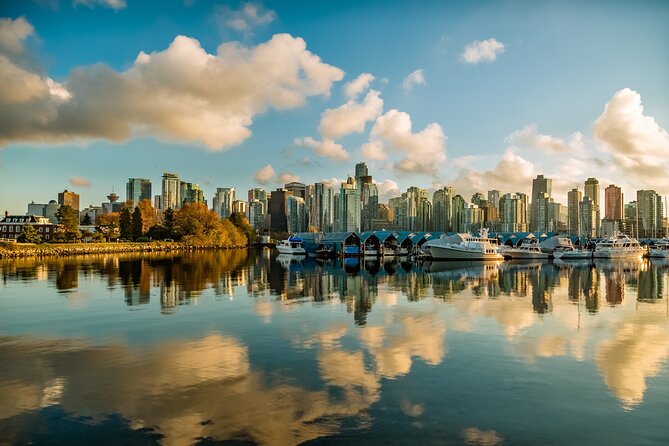
The Stanley Park Sea Wall is one of those places where you can feel the park’s energy without needing a big agenda. It’s a great early anchor stop because it sets expectations fast: ocean air, open sightlines, and the downtown skyline backdrop.
Why this works well with GPS audio:
- Narration can guide you through what you’re seeing, so the wall becomes more than a scenic strip.
- The Sea Wall is easy to treat as a “stretch and look” section—perfect for photos and a slow roll.
Practical tip: bring sunscreen and a hat. Even when the day feels cool, coastal light can sneak up on you while you’re moving and filming.
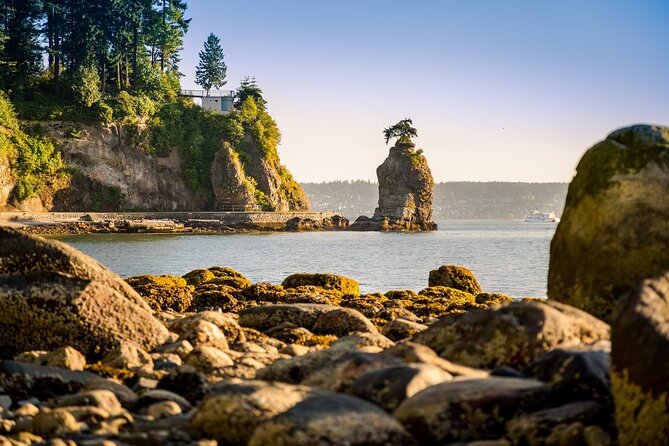
Totem Poles and Brockton Point: storytelling while you pass the classics
Next up are the Totem Poles and Brockton Point, both iconic Stanley Park stops. The value here is not just seeing them—it’s learning how to look. With GPS-guided commentary, you’re more likely to notice the details that make totems meaningful, instead of treating it like a quick photo moment and a roll-on-ward.
This section is also a good place to slow down because you’ll naturally want time to:
- read what’s there (when available on site)
- take pictures from multiple angles
- pause long enough to “land” the story in your head
If you’re riding with kids or mixed skill levels, these stops can become informal regroup points. The route is easy overall, but a short brake helps everyone stay together.
You can also read our reviews of more guided tours in Vancouver


Vancouver Aquarium area: stopping without turning your ride into a full visit
The tour includes the Vancouver Aquarium as one of the highlights where you can stop along the route. The key detail: the audio experience gives you the chance to experience the area, but aquarium admission and full entry are not listed as included.
So think of it like this:
- You can bike to the aquarium-adjacent area and enjoy the waterfront vibes.
- If you decide to go inside, plan for separate costs and time.
This is still a smart inclusion because it helps you avoid the “I missed that part of Stanley Park” feeling. Even if you’re not going into the Aquarium, the stop keeps your loop aligned with a major landmark.
Lions Gate Bridge viewpoints: photos, angles, and timing your stop
Lions Gate Bridge is another headline highlight on this route. On a bike, the best advantage is movement: you can shift your position for better photos without feeling trapped at one spot.
What I like about including it on a self guided loop:
- You don’t have to wait for a specific group schedule.
- If you’re chasing a good picture, you can spend a few extra minutes where the view is best for you.
Timing matters. If you’re sensitive to crowds, consider going earlier in the day so you’re not fighting foot traffic for photo angles. If you’re chasing softer light, build in an extra pause near the viewpoints and don’t rush the narration cues.
Third Beach (plus options like Second Beach): the “yes, get changed” moment
The route highlights Third Beach, and it also references other beaches along the way, including Second Beach. This is where packing stops paying off in a big way: if you bring a bathing suit, you’ll be set for a quick dip when conditions allow.
Even if you don’t swim, beaches are a great place to:
- take a longer rest break
- grab a snack
- reset your energy before returning to the more classic park sections
One more practical note: bring water. You’ll be moving for two hours, stopping and starting, and coastal weather can still dehydrate you.
How to think about the price: $6 is for the audio, not the bike

At $6 per person for the GPS audio tour, you’re paying for a guided self guided experience—stories, local context, and a route-aware narration track. That’s good value for people who want more meaning than a plain map app but don’t want to pay for a full live guide.
But be realistic about your total cost:
- Bike rental is separate at Spokes Bike Rental, and rental pricing can run up to about CAD 40 depending on what you choose.
- Headphones are not included, so add that cost if you don’t already have earbuds.
- If you decide to enter attractions like the Aquarium, budget for separate entry fees (not listed as included).
In other words, the $6 is a budget-friendly way to “do Stanley Park with better brains,” but your biggest controllable expenses are the bike and any optional admissions.
Who this tour fits best (and who might want something else)
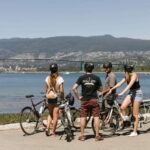
This self guided format works best for:
- first-timers who want guidance without babysitting
- friends or couples who like flexibility
- mixed-language groups (the audio supports multiple languages, including English and Spanish)
- cyclists who want an easy loop that still feels like an experience, not just exercise
It may be less ideal for you if you strongly prefer a fully spoken, live guide who handles everything. Since this is audio-based, you’ll be responsible for phone setup, listening quality (earbuds or speaker), and pacing.
It’s also worth remembering that the tour is listed as wheelchair accessible, but bike-based routes generally involve terrain and practical constraints. If you’re using a wheelchair, plan for how you’ll be transported and positioned along the route before you go.
Packing tips that actually make a difference
Here’s what I’d consider “must-haves” for this ride, based on what’s recommended:
- Charge your phone before you start. GPS and audio drain battery fast.
- Bring wireless earbuds or a speaker so the commentary is clear.
- Bring a water bottle. You’ll ride and pause under sun and salt air.
- Use sunscreen, plus a hat or sunglasses.
- Bring a snack or plan to buy along the way.
- Bring a camera for Sea Wall and bridge photo moments.
- Consider a bathing suit if you want the beach option at Third Beach (and nearby stops).
If you do only one thing: get your phone ready and keep it easy to access while riding.
My take: what you gain from choosing this self guided audio approach
A traditional guided tour can be great, but it often moves at one speed. This approach is more flexible: you can linger at the Sea Wall for skyline views, slow down for totems and Brockton Point, and decide whether you want to spend real time at the Aquarium area or treat it as an exterior stop.
The best part is the “right info at the right moment” feel. When the audio is GPS-triggered, you’re less likely to miss the meaning behind what you’re seeing—especially with landmarks like the Totem Poles, where context can turn photos into something you remember.
Should you book this Stanley Park self guided bike tour?
Book it if you want an easy, budget-friendly way to ride Stanley Park and learn along the route without committing to a live guide schedule. The $6 price is especially attractive when you’re already renting a bike anyway, and the GPS narration plus multi-language support is a strong combo for groups.
Skip it (or consider a different format) if you don’t want to manage phone audio, or if you’re expecting the bike rental and headphones to be included. Also, if you’re the type who hates fiddling with apps while moving, test your phone setup ahead of time so GPS playback doesn’t become a distraction.
FAQ
Where does the Stanley Park self guided bike tour start?
It starts at Spokes Bike Rental, 1798 W Georgia St, Vancouver.
How long is the tour?
The duration is listed as 2 hours.
Is bike rental included?
No. The bike or scooter rental is not included. You’ll need to rent separately at Spokes Bike Rental.
Do I need headphones?
Yes. Headphones are not included, so you’ll need wireless earbuds or a speaker to hear the commentary on your phone.
What route and distance should I expect?
The tour follows a 9km loop through Stanley Park.
How hard is the ride?
Difficulty is listed as easy, suitable for all levels, with a few small hills.
Is it available in different languages?
The tour audio is available in multiple languages, including English and Spanish.